User login

Field Documents

Electrical Diagrams

Power Management Module (PMM):  Enclosure containing the charge controller and power switcher.
Short battery harness:  Connects battery to multiple battery harness or other load cable.
Short 5-pin/3 battery:  Connects primary and rechargeable batteries to PMM.
Battery harness connects 2:  Connects 2 rechargeable batteries together.
Battery harness connects 10:  Connects 10 primary battery packs together.
Battery harness connects 8:  Connects 8 rechargeable batteries together.

Field Documents

Going to the field?

This section will help you get started with the basics on:

Huddle testing Station siting Seismic vaults Station installation Working with Responses to Get Units of Ground Motion
Related categories:

Station Service Procedure

Although PASSCAL station installations can vary according to the type of equipment being used, servicing is relatively straightforward and similar between station designs and equipment. 

Station servicing has 3 main goals:
• To retrieve waveform data recorded by the station since the previous service;
• To identify and rectify any problems with equipment or damage to the station;
• To refresh consumable items such as compact flash (CF) cards, batteries, etc.

A simple station with easy vehicular access should take around 20 man-minutes to service.

Station Installation Procedure

Introduction:

PASSCAL station installations can vary according to the type of equipment being used, the physical environment, and also the legal responsibilities due the land owner or administrator.  For the latter, it is assumed that the full consent of the land owner/administrator for the station to be installed, operated for the required duration, and then final removal has been obtained.  It is further assumed that state laws regarding digging permits are also being followed. See also Guidelines for Station Installation.

Installing a PASSCAL seismic station involves the placement of a number of different, but coupled, sub-systems, including (but not limited to):

Programming a Q330 with Hocus

Q330 Lab Bench Testing


First Part of Q330 SET-UP.


***Disable Internet LAN connection 1 and Enable LAN connection 2.


Connect Ethernet cables to Qnet connection on Q330.

Run Hocus.

Enumerate. Refer to Figure 1. Note: if any Q330s will not enum., check IP/FW using Willard.

Programming a Q330 with Willard

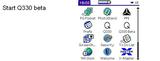
Willard is Quanterra's program to program and control Q330's. It is a standalone Windows program which allows you to set parameters, monitor data acquisition, storage, gps power cycling, sensor control, and much more. It is a very powerful and complex program which does not lend itself to a brief 'walkthrough' via a webpage.

Due to its complexity and ability to control every aspect of a Q330, it is very easy to make a severe mistake which would make the Q330 not function as intended. We highly recommend that only experienced users of Willard program Q330 parameters. You should contact a PASSCAL staff member if you have any questions regarding using Willard to program a Q330.

During training at PASSCAL, users receive a walkthrough of Willard.


Programming a Q330 with a Clie

To program a Q330 with a Clié you need to use either the "Q330 B147" or "Q330 1.491t" program. These programs can be found on the main menu of any Clié received from PASSCAL. These programs are used to send or retrieve parameters/configurations, change station names, change IP addresses, and to send commands to a Q330.

Important note: To program a Q330S (which is different from a normal Q330) you MUST use the program "Q330 1.491t"

Programming a Texan with Mini-Hub

The Mini-Hub is functionaly identical to the normal, full-sized, hub except it can only program 3 texans at a time (instead of the normal 15). It was designed in-house to act as a light weight and more portable version of the full-sized hub for when field conditions require the texans to be backpacked into a remote site.

Programming texans is identical when using either the normal hub or the mini-hub. See the Texan Programming with Pocus page for more details.

Broadband Vault Construction


Download Diagram of Vault (jpg)

Construction of the vault for broadband seismometers has a direct impact on data quality. Before construction can begin there are two other important considerations as well; location, and setting. A short discussion of these topics precedes the construction details because you should really pick the right site before going to all the work of building a vault. It takes a long time to find good sites which balance the competing requirements of low noise, access, security, position within the array, power, permission, etc. Finding one site per day is fairly productive.

Syndicate content