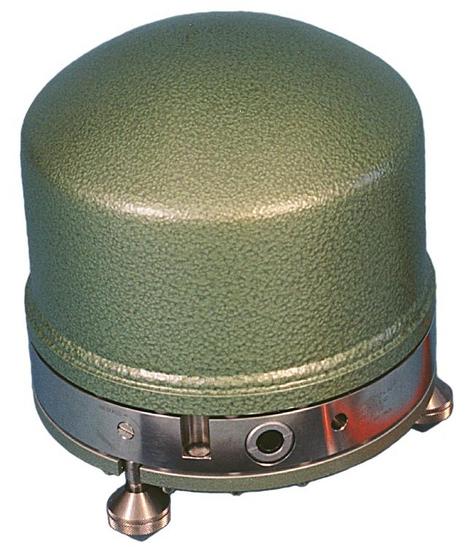
Streckeisen STS-2 Broadband Sensor

Salient Features:
- Flat response to velocity from 120 seconds to about 10 Hz
- Low power
Installation Tips:
Troubleshooting Tips:
If you cannot center the masses of even one of the 3 elements of the STS-2, all your data could be compromised.
The document provided here will guide you to a 'manual' process for attempting to get those masses centered, IF and ONLY IF the masses do not center after repeated (a dozen tries) centering commands.
Manufacturer's Manual:
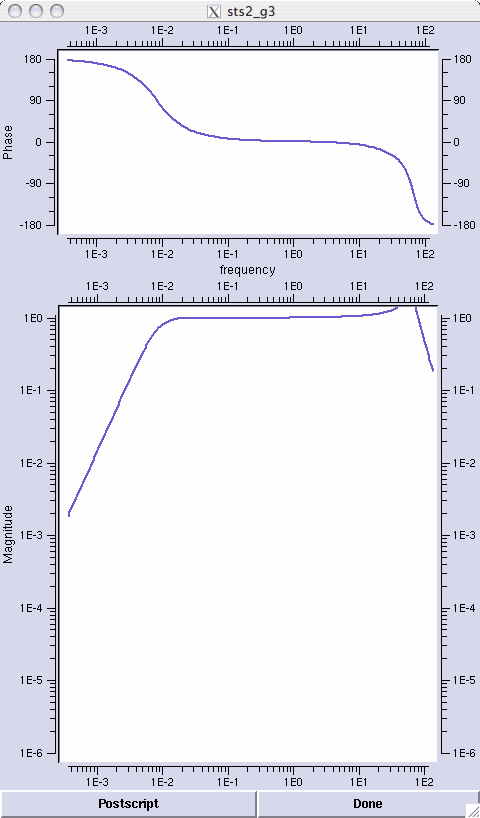
Note: Whereas the mechanical part of the STS-2 seismometer has not changed since 1990, the electronics part has been redesigned twice. There exist three different "electronic" generations of STS-2 which differ in the transfer function at frequencies above about 10 Hz. The sensitivity remains contant at 1500 volts/meter/sec from ~ 0.01 - 10 Hz. Please consult PASSCAL's poles and zeros tables for details of the different generations at the frequencies above ~10Hz. In PASSCAL's inventory database, we have assigned all PASSCAL-owned STS-2's to either generation 1, 2, or 3. Please have PASSCAL review the metadata for your PASSCAL experiment, if you have STS-2's, so we can be sure the correct response is associated with each of the STS-2's.
All STS-2's in EarthScope's U.S. Array - Transportable Array (aka TA) are Generation 3.
Response Characteristics:
Other Documents:
- PASSCAL Sensor Comparison Chart
- Determine STS2 Generation from Serial Number
- Policy for the use of PASSCAL Instruments
- Manual Leveling for a Recentering Problem
Summary Sheet for PASSCAL Sensor STRECKEISEN STS-2:

Installation Tips:
- The sensor pad should be within 5° of level, marked with lines oriented north and east. Construction of the sensor enclosure is critical to data quality.
- Try to keep the sensor cool during the set up phase. Align the sensor-orienting rod to east; the U element foot is west. Level the sensor by adjusting the feet to center the bubble level, if necessary use the mirror on your compass to view bubble. Twist the top part of the foot mechanism down (clockwise) onto the bottom part to lock it.
- Attach the orange cable, seat it all the way in. Secure the orange cable so that tugs on it (inadvertent or otherwise) do not budge the sensor and attach the other end to the green host box if it is not attached already.
- Connect the host box to the digitizer with the STS-2 to digitizer (RT130 or Q330) cable. This will power the sensor, so proceed quickly to unlock the masses.
- Unlock the masses, cover the sensor with insulation, insulate the vault and close the vault.
- Center the sensor using the handheld controller attached to the digitizer or by using the button on the host box and measuring the mass position voltages with a multimeter. Mass position voltages are pins T U V (F is ground) corresponding to U W and V respectively. The voltage should be within 1.5 volts of zero. Wait 90 seconds between recentering attempts. If after more than 10 attempts an element mass position voltage still has not crossed zero, consult PIC staff for further instruction.
Cabling Notes:
There are two cable assemblies for the STS-2:
- A 5 meter (a few 3 meter) orange cable with a 90° connector on one end and a 19 socket mil-spec connector or green "host box" on the other end and;
- Host box to DAS cable which mates with the host box on one end and the digitizer channel connector on the other end. The host box is keyed so the cable will attach to only one of the two ports. Power to the sensor is supplied from the digitizer connection through the cable to the host box, no separate power cable is required.
